
Meta
Rush Royale Matchups: How to Beat the Three Decks You Keep Losing To
Key takeaways
- Identify the opponent's archetype in wave one, before you commit your first big merge.
- Every archetype has one window where it is weakest — that is where your mana belongs.
- Change one slot between games, not five, or you will never learn what actually lost.
Most losses in Rush Royale are not bad luck: you play your own script while the opponent executes a different one, and you only notice on the wave that kills you. This guide splits ranked play into three deck archetypes and shows which wave decides each one.
Read the board before wave one ends
Identification is the whole skill. In the opening seconds you are not looking at unit names, you are looking at spending behaviour: cheap units merged immediately signal board pressure, empty space and held mana signal economy, and placements near lane entrances rather than damage tiles signal control.
Those three signals map to the only archetypes worth naming: burst banks mana for one enormous payoff, ramp converts mana into rank growth over time, and control slows the wave so modest damage is enough. Everything else is a blend, and blends lean one way.
Log what you saw at wave two for ten matches. The pattern is rarely random: you are usually losing to one archetype repeatedly, which means the fix is one card, not a rebuild.
Archetype one: the burst board
The burst player accepts a weak board early. Mana goes into economy rather than units, then arrives at once as a single high-rank damage dealer. Its damage curve is a cliff: near zero, near zero, then enough to erase a boss.
It wins because players panic when they see an empty board and over-commit. Dump your mana into a wide board against burst and you reach the boss wave with a full field of low-rank units and nothing left to answer their spike.
Beat it by staying liquid. Hold enough mana to place and merge an answer the moment their payoff lands, and keep one slot for single-target damage or a debuff. Burst also has a hard failure state: if its economy stalls it has nothing, so pressure that forces early defensive spending is pressure it never recovers from.
Archetype two: the economy ramp
The ramp deck is the patient version: two sources of mana generation, a modest board, and a plan to out-rank you by the mid waves. It does not spike, it accumulates, and by the late waves its units sit two or three ranks above yours.
The counter window is early and short. Ramp is genuinely fragile before its economy is online, so answer with sustained cheap pressure. You are not trying to kill them at wave three, only to make sure their mana never compounds.
Do not half-commit. The worst line against ramp is a medium investment that neither kills them nor slows their curve. Decide before the match: pressure from wave one with cheap units you can merge repeatedly, or race them with your own economy and win on placement quality. Sitting between the two plans loses to both.
Archetype three: the control and slow board
Control decks do not try to out-damage you. They extend every wave with slows and debuffs so their average damage has twice as long to work. Their board looks weak on the damage meter and their health total looks comfortable, which is exactly why players underestimate them.
The danger is not the slow itself, it is the timer. Control converts wave pressure into mana pressure: if waves take longer to clear, the opponent gets more time to place and merge and you get less, so by the late waves the board difference is not close.
Answer with density, not power. Splash damage that clears groups faster than they can be slowed removes the value of the slow entirely. If you are playing a single-target deck into control, accept that you must win before the late waves or not at all.
The matchup table
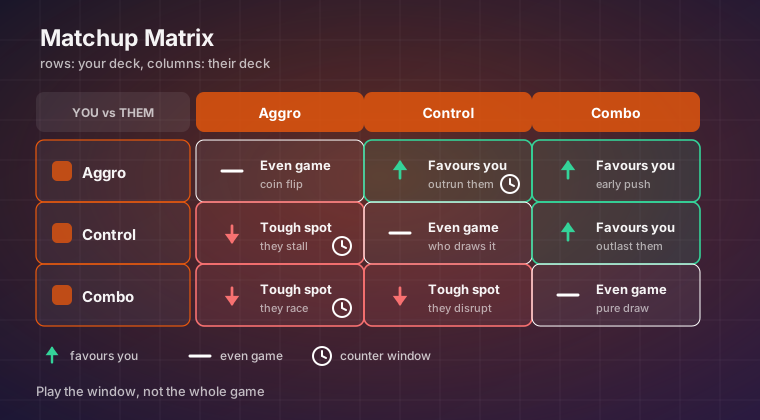
Use this as a pre-game checklist. The "slot to change" column assumes you run four fixed cards and one flex slot, which is the sanest way to build in a five-card format.
| Opponent archetype | What it wants to do | Your counter window | Slot to change |
|---|---|---|---|
| Burst / payoff spike | Bank mana early, land one very high-rank dealer and end the game at a boss | The wave their payoff lands: hold mana and answer it rather than pre-committing | Add a single-target answer or a debuff unit |
| Economy ramp | Double up on mana generation, out-rank you by the mid waves | Waves one to three, while their economy is still offline | Add a cheap pressure unit you can merge repeatedly |
| Control / slow | Stretch every wave so average damage becomes enough | Before the late waves: fall too far behind on tempo and it closes out | Add a splash-damage unit or drop your slowest card |
| Blended midrange | Do everything slightly, punish you for over-committing to one answer | Whenever they commit to a plan, usually after the first boss | Keep the flex slot as economy, not as a tech card |
- Identify the archetype by wave two, not by the result screen.
- Change exactly one slot per matchup, and only after three losses to the same shape.
- Hold mana against burst, spend mana against ramp, spend it on area damage against control.
- If the boss wave is where you die, the problem is damage type, not deck luck.
Mana discipline and the boss wave
Every matchup table collapses at the boss. Bosses test damage type, not damage volume, and this is where most decks quietly fail: a board of splash units can dominate for ten waves and then fail to kill one large health pool in time.
Check at every boss whether you have a unit whose job is single-target damage. If not, that is your flex slot regardless of the opponent. If instead you are dying during regular waves, your single-target unit is over-served and a splash unit is the better fifth card.
In clan wars and rotating daily events, read the modifier before the matchup table, since it can make one archetype much stronger for the duration.
Final verdict
Matchup knowledge is not memorisation, it is a routine you run in the first ten seconds: is the opponent banking, ramping, or slowing? Each answer has one counter window and one card that answers it, and you only need to get the wave right, not the whole match.
Then log your last twenty losses with two fields, archetype and wave. Ten minutes of that data shows which single slot costs you the most, and fixing one slot is cheaper than rebuilding around a card you happen to like.
Keep reading
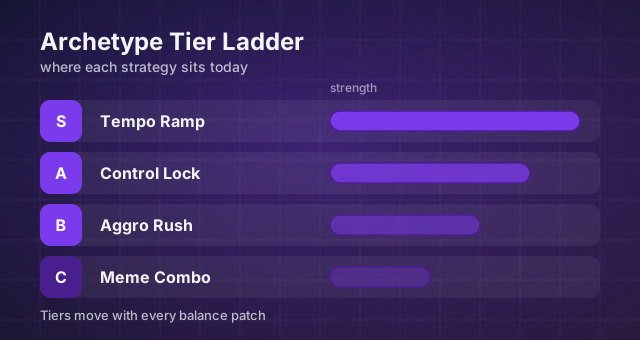
Rush Royale Deck Archetype Tier List: Which Strategy Wins Right Now
S to C tier ranking of Rush Royale deck archetypes with win conditions, best and worst matchups, and the collection depth each one needs before it starts winning.
Rush Royale Clan Wars Explained: Roles, Scoring and Weekly Routines
How clan war scoring actually rewards participation, which roles matter in a war, and the weekly routine that keeps a clan competitive without burning anyone out.
Rush Royale Off-Meta Decks That Still Win Ranked
Why unfamiliar decks beat stronger ones on the ladder, how to pick an off-meta direction, and the collection depth it actually needs.